Thorin Oakenshield
(7 1/2" x 11" watercolor, digital)
(7 1/2" x 11" watercolor, digital)
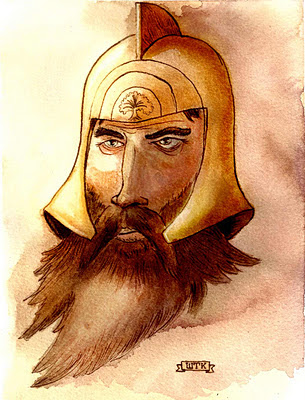
Here is Thorin in all his digitally edited glory.
I had a lot of fun exploring this watercolor thing fully for the first time. I will say though that I was quite disappointed in the way I managed the color. I know very little color theory in general, but I knew that the helmet here was going to be gold, so in order to create a somewhat effective image, there would need to be a cooler, contrasting color (preferably in the shadow areas).
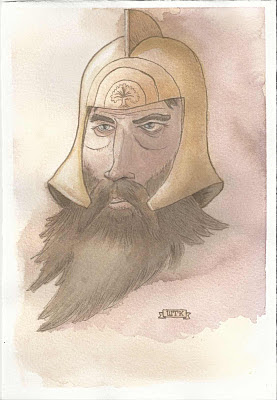
I believe that in the end it all ended up pretty muddy, because I was afraid of adding too much color into the image and making it to bright and vibrant. So, I continued to add wash after wash of light, muted color. This turned out to be somewhat of a disaster.
But there was a glimmer of hope! I could use Photoshop to improve this right? This all-powerful tool of pixel wizardry could turn even the worst of watercolors into a masterpiece! So I scanned it, and began.

The Un-Edited Scanned Painting.
I had a lot of fun exploring this watercolor thing fully for the first time. I will say though that I was quite disappointed in the way I managed the color. I know very little color theory in general, but I knew that the helmet here was going to be gold, so in order to create a somewhat effective image, there would need to be a cooler, contrasting color (preferably in the shadow areas).
I believe that in the end it all ended up pretty muddy, because I was afraid of adding too much color into the image and making it to bright and vibrant. So, I continued to add wash after wash of light, muted color. This turned out to be somewhat of a disaster.
But there was a glimmer of hope! I could use Photoshop to improve this right? This all-powerful tool of pixel wizardry could turn even the worst of watercolors into a masterpiece! So I scanned it, and began.

The Un-Edited Scanned Painting.
The The scan was, of course, very greyed out and bland. Scanners have the evil intent of ruining your every attempt at artistic excellence. So upon entering Photoshop, I had to adjust the Levels to get the values back to normal. After this, I added several (as in five or six) Color Dodge & Color Burn layers. I painted over various areas of the painting in these layers with colors that I sampled from the image. This brightened and darkened the different colors I wanted to emphasize, and that I unfortunately wasn't able to achieve in the original painting. It also allowed me to create the illusion of the highlights "glowing". Finally, I dabbled with a Color Balance layer or two, giving the shadows a darker Violet tone to contrast the Yellows of the highlights.
Another thing that you may notice is that I eliminated those ghastly bags under Thorin's eyes with the Clone Stamp tool. I have no idea what possessed me to put those in the drawing.
So, hope you liked that little run-down of my process. Let me know what you think could use improvement. Now, on to other characters!
-Will


